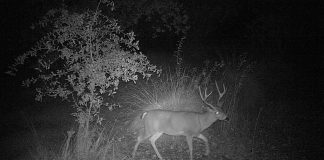
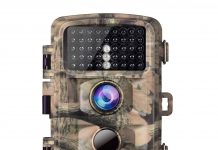
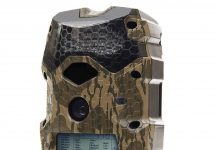
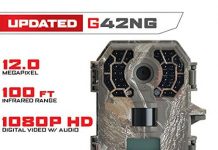
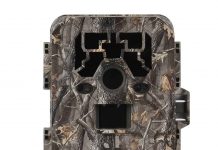
Using a trail camera is not as complex as it may seem. However, with the fact that you won’t be around when your trail camera captures a fleeting moment of a deer or a bear, you won’t be able to adjust the settings and achieve your desired photo afterward.
Most advanced hunters use a trail camera to study deer pattern. And having low-quality images or blurred pictures will not lead you to a trophy buck this season. That’s why you need to improve how you use your trail camera.
Today, we are going to share the top 15 best trail camera tips every hunter should know about. The following are the tips on how to use your trail camera that you should keep in mind and you’ll be rewarded with a high-resolution picture of your target animal.
1Avoid facing your trail camera to the sun
Rule number one when it comes to choosing a location and mounting your camera is that you shouldn’t let the device face the sun. The sensor technology of your trail camera might end up capturing tons of blurred and sunlit vegetation if you do so.
Aside from that, it can also lead to temperature change with the breeze coming around. Your trail camera, sensitive to any motion or changes, will automatically capture images thinking that a deer must’ve walked by or squirrels are near the area.
One of the frustrating things you could encounter is when a trophy buck is standing in front of your camera, the trail camera captures the movement, but eventually, you’d find it blocked by the sunlight.
Therefore, you should find a place where your trail camera can avoid the sun. It will help you to get clearer and brighter images of your captured animals when you do so.
2Make sure that your trail camera firmware is updated
Similar to other electronic devices, your trail camera is powered by a firmware that needs to be updated now and then. Manufacturers of trail cameras aim to improve their firmware by locating bugs and fixing them.
Updating your firmware will help you to capture better images in the field. You eliminate delays, bugs, and other malware that could affect your outdoor shots.
Now, when updating your trail camera firmware, it is a must that you follow the instructions carefully. Your trail camera is at its most vulnerable state while updating and you run the risk of damaging your trail camera if you don’t update it properly.
3Set up multiple cameras
Advanced hunters know the importance of setting up multiple cameras. In that way, you will be able to capture a deer or a bear at all possible angles. Now, you don’t have to burn a hole in your pocket by buying multiple trail cameras when you can create your own.
As much as possible, number your cameras to know the exact location and angle of the picture when it comes to organizing it later. It will help you to save time and determine which is which.
Setting up multiple cameras will also give you more opportunities to capture amazing shots of wildlife. Positioning your trail cameras in one property can assure you of well-taken photos when you retrieve it later on.
4Stay away from places with less potential
Think of how a buck would respond to places. If the area is abundant with food and shows no signs of human presence, it would be most likely to go there and hunt for food. Stay away from places that have less potential, less food resource, and abundant human traces. The buck will try to avoid these areas, and that means a lesser chance of you capturing a good photo of your target.
The next time you scout for areas, leave a trail camera to a potential spot and see if there is a rack buck that visited the spot before you set up your other trail cameras around.
5Angle your trail camera properly
Angling your trail camera is one of the best ways to capture better images. For instance, during winter the sun’s path is low, and you’d want your camera to be facing the south.
But during summer, you’ll want to point it to the north direction to avoid being blocked by the sunrise and sunset. While natural light is essential to capture the best of images, it is also important to avoid the sunlight from blocking your photo.
6Pay attention to possible obstruction
Once you’ve mounted your trail camera to a tree, make sure that it is free from any obstruction. Twigs, low-lying branches, and leaves can ruin your photo. Aside from that, when the wind blows hard, and the branches sway, it can trigger the sensor technology of your trail camera and capture hundreds of twigs and branches. It is worth considering to invest in the best trail camera lockboxes to ensure the security of your device.
Clear the path of your trail camera and ensure that nothing is obstructing the flash and the lenses. Try to capture an image with your trail camera first before you leave it, so you can determine any possible obstruction that you need to eliminate before you finally set it up.
7Have a specific target
Unless you are not interested in hunting and only wanted some outdoor shots, it is important that you have a specific target. Let’s say, the same deer appeared multiple times in front of your trail camera in a particular time and followed the same route every time it does.
Now is the time to study the deer’s pattern and blanket the scope of his path. In that way, you’ll be able to have a chance of capturing a better image of the buck every time the deer revisits the area. It also helps you to analyze the behavior of the deer and gives you a chance of shooting it at the right time.
8Make sure that your trail camera is hidden from thieves
Let’s face it; some people make it a habit to visit the forest just to strip off expensive trail cameras off trees. Now, you don’t want to experience the same thing. Therefore, you need to make sure that your trail camera is hidden from the thieves.
If you’re going to provide a feeder, make sure that the location of your trail camera is not too obvious that it would attract not only deer but also thieves towards the direction.
As much as possible, mount your trail camera above eye level. This makes it harder for the thief to reach the trail camera. Trail cameras high above the tree can discourage the thief and move on from trying to steal it. Aside from that, it does not catch the attention of anyone passing by the direction.
If you have extra budget, opt for trail cameras with security codes. Even if the thief had stolen your camera, there is no way they can use it for themselves. In rare occasions, they would throw the camera back where they have stripped it off because of this feature.
Most hunters use a black nylon mounting straps. Stay away from this thing. Instead, you should use a baling wire when wrapping it around the tree. It has zero visibility especially when looking from a distance and can disguise your camera from other people.
9Take your time
Once you’ve mounted your trail camera, you can’t expect to retrieve a good image overnight. Take your time in checking your trail camera otherwise you decrease the chances of capturing a good shot. Once a deer notice any trace of human presence, it will avoid the area.
You can limit checking your trail camera for up to two weeks at most. Contrary to common trail camera myth and for best results, you can leave it up to three weeks. That’s why it’s important to conceal your trail camera from the possible thieves because it will take a while for you to retrieve your camera and check what have you got.
10Select the best battery model
Because you are most likely to leave your trail camera in the forest for a week, make sure that you select the best battery model. Choose a set of batteries that have a longer lifespan. In that way, you don’t have to retrieve your camera now and then to change the batteries. Aside from that, going to the same place over and over again will only notify the bucks of your human presence and will most likely avoid the area.
11Cover your scent
You can minimize checking your camera, but you can’t avoid it. In this case, you need to cover your scent to avoid alerting the bucks of your present. Here are the following ways that you can cover your scent:
Invest in a pair of scent-free neoprene gloves when holding your camera. Before you leave, you should wipe it again using a scent concealer spray.
Spray the trail camera itself with scent concealer eliminator and wipe it with clean clothing. Make sure that you do not smudge the lens when you are spraying otherwise the images will be blurry, and it can also affect the quality of the image.
When you visit to check your trail camera, we suggest you wear a pair of rubber boots instead of your regular hunter’s boots.
12Opt to check your trail camera during rainy days
Aside from the scent eliminator spray, the rain can eliminate any scents left behind by humans. To ensure that you don’t leave a scent trail when you leave, we suggest that you check your trail camera only when it rains. In that way, the deer wouldn’t be able to detect your presence in the area.
As a hunter, you ought to study and use the wind direction to your advantage when visiting your trail camera. In that way, the wind will carry your scent opposite to the direction where you suspect the deer is headed.
13Create a fake scrape
Bucks are drawn to where their animal scent is located. Take advantage of this fact and create fake scrap. To do so, you need to look for a tree with abundant growth of leaves and a low-lying branch at least seven feet above the ground.
Now, start raking the brush and dirt at least six feet from the tree, and you can sprinkle some of the deer urine in the area. Mount your trail camera on the tree to get the best angle. Create fake scrapes in several areas of the forest where you think the bucks are most likely to visit. After a few days, check your camera and focus on the site where most bucks are active.
14Use trail cameras with a black flash
As much as possible, you should use a trail camera equipped with a black flash. Standard trail cameras use white light when capturing photos and can alert the deer. Other trail cameras use red light when capturing images, and that’s not good either. However, a black flash camera uses a no glow infrared flash, allowing you to capture your target without startling them in the process.
There is no exception of trail cameras that generates a little noise when capturing photos but you can minimize the chances of startling your target by using a black flash camera. It also helps to avoid catching the attention of potential thieves in the forest.
15Put bait in front of your trail camera
Assuming it’s legal in your state, you might want to put a bait in front of your trail camera to attract more bucks. You don’t need to buy expensive deer baits in the market. You just have to make your own. Usually, it consists of mineral licks and towels soaked in vanilla. Having a bait in front of your trail camera will help to increase your chances of capturing your target deer.
Learning how to use your trail camera effectively will help you to produce better images in the long run. Do not expect to achieve fantastic image result overnight. It might take several tries before you can have the photo that you’ve been working on. But the tips as mentioned above can help you improve on how you utilize your trail camera to capture your target buck.


