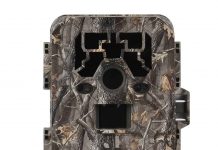
Hunting gears wouldn’t be complete without a trail camera. Hunters used trail camera to keep an eye for bucks on their property, study their movements and patterns, and strike when the right time comes.
If you are still a beginner, it might be daunting to use your trail camera for the first time. You will commit a lot of mistakes before you can achieve your desired photo.
In this article, we are going to talk about beginner tips for using your trail camera that will serve as your guide. Here is a complete guide for beginners when using their trail camera for the first time.
1Learning How it Works
While you may be looking forward to taking your trail camera to the field and setting it up, it is wise to master the functions of your trail camera first before you use it.
Knowing the essential functions of your trail camera will make it easier for you to make the most out of it. To make it easier to understand, here are the following things that you should keep in mind.
- The trail camera’s detection range works by sensing any motion within the proximity. It will send the signal to the system to automatically capture the moving object during daylight and nighttime.
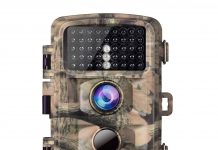
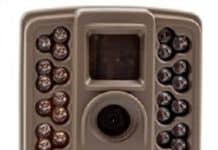
- Standard trail cameras are equipped with white flash. It can generate vibrant images during nighttime. The only downside is that it can scare the buck away. Aside from that, it can be easily spotted by unwanted human intervention when the flash turns on.
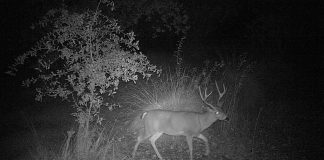
- On the other hand, no-flash infrared trail cameras are the best choice if you want to hide your camera in the forest effectively. Detecting one is difficult for it produces no light. And it does not scare the buck away, too. However, these types of trail camera can only produce grainy photos taken at night.
- We also have infrared trail cameras that can be classified as a no-glow trail camera. It generates minimal glow when capturing images and is suitable for concealing the device at night.
The trigger speed of your trail camera refers to the time consumed when it detects a movement in front and how fast it captures the picture. The recovery time of the trail camera refers to the time that it will take before the trail camera can capture the moving object, store it in the SD card, and prepares the system for another capture.
Buying a trail camera with ultra-fast trigger speed will help you to capture a passing deer in just mere seconds. But since these types of cameras are costly, you can settle for standard trigger speed. The trick is to place your trail camera near the food source where bucks are most likely to spend a long time before going away.
2The Best Time To Put Your Trail Camera
Now that you know the basics, you are ready to go to the field. But before you step out, you might want to know first the best season to set up your trail camera and wise angle positions to mount it:
- During summer and spring
Hunters set up their trail cameras during this season to know the bucks to expect when the hunting season arrives. In this season, it is wise to angle your trail camera to possible food sources of the bucks. The bucks are most likely to find watery holes if the climate is hot, so don’t forget to install your camera in these areas as well.
- During late summer and early fall
Early fall is when the temperature changes from hot to cold. The bucks are most likely to be shedding their velvets already in this time of the year. It will also cause a difference in their travel patterns. Before you transfer your trail camera to other areas, wait for the temperature to get colder first. Using the data you collected last summer, install your trail cameras to the trails that had the most massive traffic of bucks.
Also, keep in mind that late summer and fall makes chestnut trees a target for the bucks. This is the time when you can create a fake scrape to attract the bucks (near a chestnut or apple tree to increase your chances). To avoid scaring the bucks, ensure that you do not place your trail camera directly above the scrapes. Putting some distance between the camera and the fake scrapes can make the bucks feel safer.
- During winter
Since the hunting season is nearing during winter, you might want to transfer your camera to places with massive food sources. It will give you the information of which among the bucks have survived the winter as they start to look for food again. Some deer in this season may start to shed their antlers as well.
3Choosing A Location
To make it more specific, here are the following factors that you need to consider when it comes to choosing the location in setting up your trail camera:
- Food source– this is the first thing that you should consider. To use your trail camera effectively, you should place it in a location with an abundant source of food. Breeding attractants will draw the group of bucks traveling together. Mineral licks will help you to attract the deer and make them stop. This will give you the opportunity to capture a better picture of them. Keep in mind that camera traps can be seen by your target animals too, so you should be extra careful.
- Trails- one of the common mistakes that beginners may commit when setting up their trail camera is angling it directly to the trail. As much as possible, you should turn it up, allowing your trail camera to detect movement from a distance. Chances are if you let
- Sunlight- this is also one of the factors that you need to consider when setting up your camera. Do not turn your trail camera to the sun otherwise, it will capture the heat movement and will result in hundreds of empty images. The detection technology is so sensitive that it can detect the heat from the sunlight. The trail camera is most likely to capture the wind movement and vegetation, so keep that in mind.
4Analyzing Data
You’ve set up your trail camera at the right time and in the right place. Now you’re off to retrieve it. Here are the following tips that can help you analyze the data you’ve adequately gathered:
- Put the stamp on- when buying a trail camera, the information strip stamped at the bottom of the image is essential. It will tell you the time when the animal was captured, the date, and even the moon phase. Having stamps in all of your images will make it easier for you to analyze the data you’ve retrieved later on.
It also helps you to determine where the bucks are headed. The weather, speed, and travel patterns of the bucks can be determined with the help of stamps. So do not overlook it when you preview the pictures on your computer or the field.
- Consider the phase- studying the buck’s behavior also gives you the information that you need. For instance, during summer, bucks are most likely to hunt for food. That’s why baits and fake scrapes are most effective in this season. Their population is most likely to decrease during winter because some of the bucks wouldn’t be able to survive the cold. In that case, you need to scout the area for places that may be able to provide shelter and protection for the traveling bucks.
- Be patient- most importantly, you need to be patient with the data that you’ve gathered. Now that you’ve studied and analyzed the travel pattern of the bucks, you can now determine the right time to strike and hit the trophy buck.
5Scouting The Area
Since you are going to leave your trail camera for two to three weeks, you might want to make sure that you’re going to capture images of bucks traveling surely. Scout, the area first before you, permanently set up your trail camera.
That being said, look for areas where bucks are most likely to travel. Set up a trail camera and leave it for a few days. On a rainy day, come back to retrieve your trail camera and see if it has captured something or if it shows signs that bucks are traveling this area.
When it is confirmed that bucks are most likely to pass by the area, that’s when you set up your other trail cameras. To get a better angle and useful information, we suggest you install multiple trail cameras that can cover the entire area.
While scouting the area, you might want to watch out for other human presence than yours. Even if you think that bucks are most likely to take down the trail, if you’ve noticed other human presence in the area, you might want to look for other places because the chances are slim that the bucks are going to travel the path again.
6Tips To Remember
- We recommend setting up your trail camera during mid-day. It’s the best time of the day. Bucks usually travel at night, and you might spot some of them early in the morning. The last thing that you want to do is scare them off by visiting the trail camera at wrong times.
- Watch out for upcoming rain. It is best to check your trail camera after the rain as it can help wash off your scent. Bucks stay away from areas when they detect human scent.
- Check your sensor before leaving your trail camera. It is crucial that it is pointing to possible directions where the deer may come from. In that way, it can capture the movement of the buck and adjust it to the proper height of the deer.
- Make sure that your battery is fully charged. Do not check your trail camera frequently as it may warn the bucks of your presence. It is wise to invest in a battery with a longer lifespan for your convenience.
- Opt for trail cameras with long range and motion freeze. It can help to avoid blurry images especially if the deer is moving fast. The last thing that you wanted to see is tons of blurred images of the bucks that will give you false information about how big they are, their travel patterns, and their next move. Clearer pictures can give plausible data.
- Always make sure that you have reformatted your SD card before you leave your trail camera. If you don’t, you risk not being able to save the most important pictures and waiting for nothing at all. Or if you had managed to keep images, the chances of unreadable files are most likely. So make it a habit to reformat your trail camera before leaving.
- Keep your cameras hidden from potential thieves by learning how to use the bush and branches as a concealer of your trail camera. Aside from that, there are many ways to ensure that your trail camera doesn’t catch unwanted human attention when it detects motion and takes a picture.
7Conclusion
Unlike digital photographers, you are not present to tweak and adjust the settings of your camera to achieve your desired image result. That’s why you need to make sure that everything is settled before you leave your trail camera to capture the best photos in the woods.
We understand that using your trail camera as a beginner may seem like a daunting task. Practice more and learn on your past mistakes. You will discover trail camera techniques along the way as you recognize what went wrong the last time you set up your trail camera.
Follow the aforementioned tips, and you are most likely to get better image results of your target animals. Using a trail camera for the first time is never easy, but you can minimize your mistakes and ensure that you can produce professional results. Expect to go through a trial-and-error stage, but the results are rewarding and worth it at the end of the day.


